
Welcome back to another Saxony strategy. This week we’re going to delve into Saxony Patriotic, and figure out a relatively competitive turn by turn process.

Just a disclaimer, I had a different strategy for this combo up until a couple months or so back when I ran across a video from YouTube strategist and all fantastic player, FOMOF. Since then, I amended my opening to what I saw him do, and after doing a great deal better in my games because of it, I’ve now adopted the opening few turns I learned from him.
As such, I really want to share his video with you because it contains a lot of great strategy for Saxony well beyond a step by step guide. And, I want to give him the credit he deserves for making the strategy I use possible.
Alright, let’s start digging in.

As Saxony, we begin the game with 1 Power and 4 Combat Cards. With the Patriotic Mat we start the game with 6 Coin and 2 Popularity.
Patriotic Mat.
Generally speaking, the Patriotic Mat is a bit slow to start; but what it lacks in initial speed, it makes up for in mid-late game strength. Before starting, it’s important we have a semblance of an idea of what our mat’s strengths and weaknesses are. Taking a considering look will help us flesh out some strategy for our game and subsequent actions:
First Row, Move / Upgrade (2 Oil) + $1.
- We’ll always need to move in Scythe, so it’s important to have something easily usable as a bottom row action to enhance that movement.
- Having a set 2 Oil upgrade cost is nice in that it gives you the immediate ability to Trade and Move with a turn 2 Upgrade.
- Add in the additional gain of $1 per upgrade and you have a consistently strong row.
Second Row; Bolster / Deploy (4 Metal) + $3.
- In the hands of Saxony, this is our strongest row. Though, the initial cost to Deploy is steep, the fact that we can discount down to only 1 Metal gives us a ton of flexibility to delay our deployments.
- Having Bolster and Deploy in the same row, we can net 12 Power and $8 in the 4 uses it would take us to get a Mech Star, making it not only lucrative, but a potential to also nab the Power Star.
- Saxony starts with a Mountain in their base, so from our early turns, this row can be accessible to us.
Third Row: Trade / Build (4 Lumber).
- For Saxony, this is our weakest row. Though the trade action is useful, the difficulty of building a structure at a cost of 4 Lumber is tough.
- Upside: Despite the initial cost, we can discount down to 2 Lumber after two upgrades. This streamlines the mat to be able to Trade for 2 Lumber and Build seamlessly.
- Downside: We have to use two Upgrade actions just to make it work for us. We also have to cross the river as Saxony to access a Forest hex, so producing for Lumber won’t be possible early game. Last, we net a loss of 1 coin per use.
Fourth Row: Produce / Enlist (3 Food) + $2.
- This is another strong row as it encourages us to get the food for an Enlist as we will be producing a good amount of times. Plus, it gives us $2 per Enlist.
- We also have the ability to discount the cost down to 2 Food, opening up the doors to work with trade in a pinch.
- The downside with Saxony is that quick and proficient access to Farms won’t happen until at least our Speed and Underpass mechs are deployed. So either we have to be creative and get some options, or we have to wait until mid to late game to be able to produce Food and Enlist seamlessly.
Strategy.
Now that we’ve put in our due diligence with taking inventory of what our strengths and weaknesses are, let’s discuss our strategy. Keeping in mind, all strategy needs some room for flexibility in this game.
First, the Stars we’re most likely going to go for should be at the forefront of our mind. Given Saxony’s “Dominate” ability, which allows us to obtain two Objective Stars and as many Combat Stars as we can chase down, we have reason to lean toward building up our power and getting mechs to move around and fight.
Because it’ll take four Bolster / Deploy actions to achieve our Mech Star, we’ll want to consider getting our Power Star as well. Since we net 12 Power over those actions and start with 1, it would seem plausible we could make up the 3 along the way. However; because Saxony benefits from a lot of combats, the chances are that we’ll be depleting that power as much as we’re filling it. Not to mention later Produce actions will start costing us 1 Power after we get out our first 4 workers. The Power Star shouldn’t be off the table in the event the game makes finding combats difficult, but we shouldn’t sacrifice our abilities to make it happen.
We’ll be producing for Metal and Oil to get our Deploy and Upgrade actions. We already know we want to go for our Mech Star since that’s our most profitable row of actions, but we need to consider what else we can be producing. Getting enough Oil to fulfill our Upgrade Star isn’t unlikely, but once we get our mech costs down, there isn’t a ton of reason to keep upgrading except for getting the Star. The downside to that is it forces us to keep our workers positioned on Tundras for the Produce action, and worse, it takes six upgrades to get the Star. Though we’ll probably be using the Move action enough to justify that being possible, it’ll still come down to if we can manage to get enough workers producing Oil to make that possible. So, again, maybe not our first choice, but also not totally off the table.
Speaking of producing enough, we know we’ll want a couple additional workers to help with that, and typically it isn’t much of a stretch during a game to throw a few workers on a Village for a produce action to get the Worker Star. So, we’ll have that as a frontrunner.
Getting a Build Star isn’t going to happen. We won’t be able to divide our focus on upgrading and producing for mechs to have the resources to make structures happen. Best just to be real with our capabilities and dismiss trying for this one.
Getting an Enlist Star isn’t impossible, but it’s also unlikely. Were the heavens to align and shine down on us, we may get the option to pay for Enlists or get Food through Encounters, but it’s never a good strategy to plan on Encounters making something happen. But, because it’s possible, and because late game we may get the opportunity to Produce on a Farm hex, we’ll leave it at the back edge of the table.
All in all, it would be to our benefit to plan on getting the Mech Star, Objective Star(s), Combat Star(s), and Worker Star, with a flex plan of getting Power, Enlist, or Upgrade Stars as a fallback.
Objectives.
Let’s also look at our objectives before we start. Something a lot of players mistakenly do is disregard their objectives as far more optional than they should. With Saxony, you can get a Star per objective – meaning two potential Stars. So objectives aren’t something we should disregard at all. As we look at them we need to ask:
- Is it possible to accomplish these during normal turns, or do we need to do something special? E.G. take additional move actions to occupy certain hexes.
- With our mat, is it likely we’ll be able to accomplish these without derailing our end game? E.G. trying to build structures when it takes half the game to even acquire the workers and hexes to do such.
It’s always best to have a semblance of a plan in mind with objectives. It’s easier to decide not to get objectives mid game than it is to realize we’re short on Stars and have to rush around the board to complete an objective.
Objective Example.
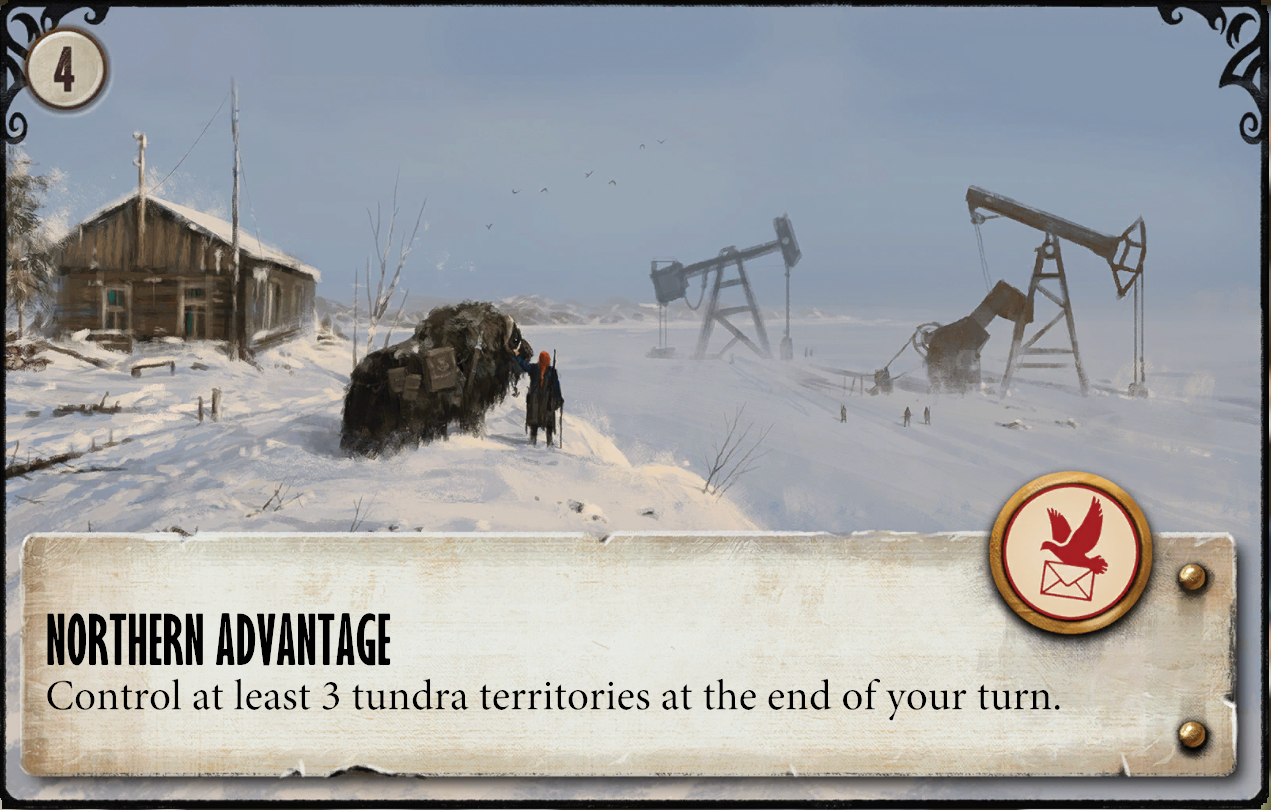
In this playthrough, I got “Northern Advantage” and “Get Rich or Cry Trying.” Both of which are totally possible to accomplish and have the flexibility of being possible throughout the game. And of course, as Saxony we love the flexibility and lack of limitations.
“Northern Advantage” basically says we need to control three Tundra hexes at the end of a turn. All that involves is finding the right opportunity in all our moving around to coordinate some units to do just that. We’ll likely seek some combats on Tundras or just get lucky and be able to move workers through Tunnels to them.
“Get Rich or Cry Trying” is a bit more challenging, but definitely within reach with the Patriotic Mat. Basically, we need to have 20 or more coins by the end of a turn. For us, this will mean making some frugal decisions on Encounters and not relying heavily on using the Trade action.

Now, had we gotten an objective like “Build Local Infrastructure” – which states we’d need to build at least three structures, none of which are adjacent to our home base – we’d have to opt out of that as there’s no way we’re planning on building one structure, much less three.
Saxony Patriotic Strategies.
Saxony Patriotic has some various options for strategy, but the best known and most common one is very focused on moving a lot to get out onto the board; to get Encounters when possible, to get combats, and to get to the Factory. The engine of this combo works well for generating mechs and power and staying actively on the hunt for possible combat.
Saxony Patriotic Step by Step Strategy.
Now that we’re getting down to the actual playthrough, we want to consider our opening turns, as these will set the foundation for the pace of game we want to play. Knowing how inexpensive an Upgrade is from the beginning of the game, we’ll be taking advantage of that a couple times to help us strengthen our top row actions and discount our bottom row.
OBJECTIVES: Northern Advantage, Get Rich or Cry Trying.
- TRADE: 2 Oil.
- MOVE: Hero to Mountain, Mountain Worker to Tundra. UPGRADE: Move / Deploy.
- PRODUCE: 2 Oil.
- MOVE: Hero and 1 Worker to Village Encounter, 1 Worker to Mountain. UPGRADE: Bolster / Deploy.
- Encounter: We’d like options to hasten our Deployments, Enlists or Upgrades. Enough Food to get an Enlist action the next time we produce, Enough Metal to Deploy a mech, or enough Oil for a future move action would be good as well.
- We received Encounter 14. All options are solid, but paying 2 Popularity for 1 Worker and 3 Metal I like best because it saves us an entire Produce and Trade action. Negating two whole turns is a huge advantage. Had this not been the case, we would’ve needed our next two turns to be Produce and Trade for 2 Metal to get the same result.

- BOLSTER: 3 Power. DEPLOY: Speed Mech on Mountain.
- PRODUCE: 1 Metal, 2 Workers.
- BOLSTER: 3 Power. DEPLOY: Underpass Mech on Village.
- MOVE: Mech + 3 Workers to Tunnel Village, Mech + 2 Workers to Togawa Mountain, Hero to Togawa Mountain Encounter.
- Why did we move here? Without Togawa in the game, or moving early enough that Togawa hasn’t occupied their Mountain hex with their Hero or a mech, we have the rare opportunity of reaching another encounter with our Hero during a needed move action to spread ourselves out.
- Encounter: Here we’d primarily like an Enlist or enough Food to Enlist. Barring that, an Upgrade or Oil enough to Upgrade. Enough Metal for a mech would also save us a produce action.
- We received Encounter 12. Not exactly what we’re needing. I picked gain 2 Food and 1 Popularity because there’s a chance we might be able to gain Food enough to Enlist with a combat, Encounter, or even a later Produce action. We also have to remember our Objectives. In this game we have two that are possible to get and “Get Rich or Cry Trying” is only possible if we’re being frugal with our coin.

- PRODUCE: 2 Metal, 3 Workers [Worker Star].
- BOLSTER: 3 Power. DEPLOY: Riverwalk Mech on Tunnel Village.
- MOVE: Hero to Crimea Village Encounter, first Mech drop off 4 workers on Tunnel Farm and move to Tunnel Mountain, other mech drop a worker off on Factory Mountain, and meet with the first mech on Tunnel Mountain. 2 workers and 1 mech remain on Togawa Mountain while 1 worker remains on Tunnel Village.
- We had the potential for combat during this Move action; however all options also had an opponent’s worker or two on them. With only 1 Popularity to our collective name, we need to keep that for at least one more Produce action to gain our Food to Enlist and Metal to Deploy.
- Encounter: At this point we have our mechanisms in place to complete the necessary bottom row actions, so getting some Power, Combat Cards or Coin would be ideal.
- We received Encounter 1. We want to save our popularity to produce, and don’t need to spend money on resources, so we’ll take the $2 and 1 Popularity.

- PRODUCE: 4 Food, 2 Metal. ENLIST: Enlist bonus and Combat Cards reward.
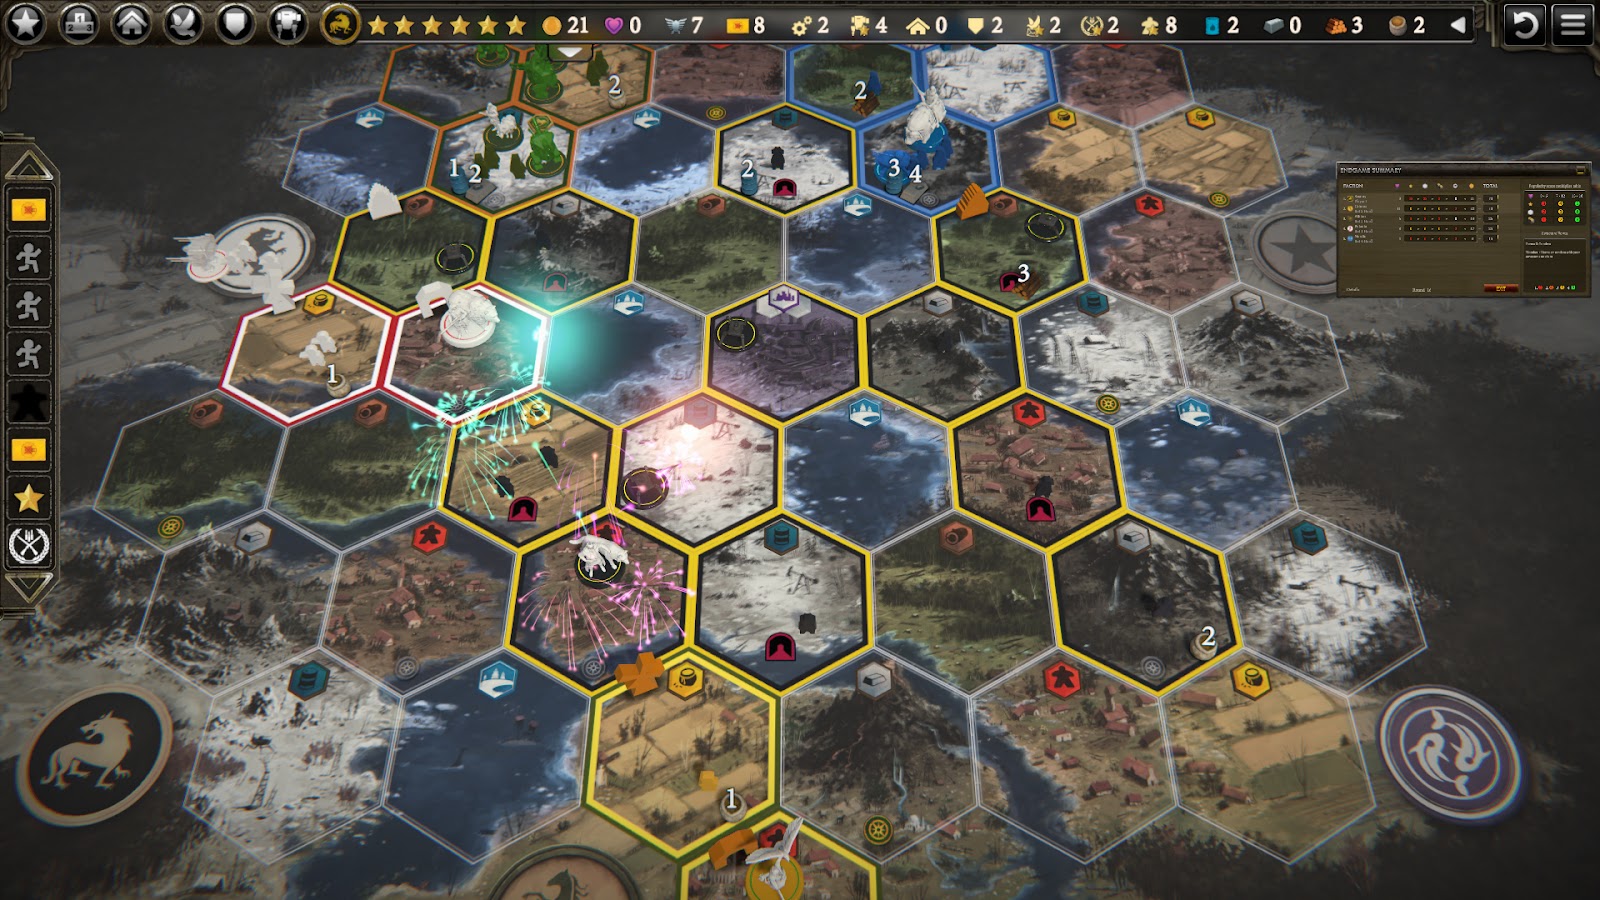
- MOVE: Mechs from Tunnel Mountain to pick up a worker each and bring them to combat with Polania on N. Tunnel Tundra, mech on Togawa Mountain drop off worker on S. Tunnel Tundra and move to Tundra adjacent to Factory. [Combat Star] [Objective Star].
- We had the chance to get a Factory Card, but completing “Northern Advantage” seemed like a better option as it frees us up to move about as we like now.
- BOLSTER: 3 Power. DEPLOY: Disarm Mech on Tunnel Farm [Mech Star].
- PRODUCE: 2 Oil, 2 Food. ENLIST: Power bonus and Coin reward [Objective Star].
- This turn was a struggle. I wanted to see if we could end the game with a move action and two combats, but it would’ve been too risky as the other factions had several units per hex and too much power to get anything easy.
- We had enough Food to just Enlist, which would’ve been fine; however, taking the loss upfront to gain additional resources for scoring in the endgame would be more beneficial. Losing 1 Popularity and 1 Power would do nothing to inhibit us. Losing 1 Coin was a bit tougher, but we still gained 2 Coin in our Enlist reward to get our “Get Rich or Cry Trying” objective of having 20 or more coin.
- MOVE: Mech to combat with Polania on their Forest hex, moving mechs and workers to more spaces and occupying the Factory. [Combat Star].
END GAME STATS
- Stars (6): Mech, Objective (2), Combat (2), Worker.
- Round 16, 70 coins.

Thoughts.
Patriotic is a strong Scythe Mat with any faction, but with Saxony, it seems to thrive. It allows us the freedom to shift between movement, reloading with a Bolster action, and moving again which emphasizes the strengths of Saxony’s abilities. With this game, we had a lot of things go our way with early Encounters giving us a huge jumpstart. That won’t always be the case; however, this combo can still pack a punch and carry its own weight keeping other factions on their toes and controlling the game’s momentum for consistent finishes well before round 20.
One option I didn’t follow through with was getting our Hero to the Factory. There was an option on turn 13, but we could’ve even prioritized getting there a few turns earlier. The Factory can give us some decent options for enhancing our game, but sometimes – like in this game – it’s not really necessary and won’t give us any usable bonuses unless we occupy the Factory hex at game’s end. There are some matches that getting to the Factory ASAP might be the best strategy. For instance; during turn 8 when we moved to the Togawa Mountain Encounter. Had Togawa been in the game and either that encounter was gone or a Togawa mech was occupying that hex – preventing our Underpass ability from getting our Hero there, it would’ve been to our benefit to position ourselves for getting to the Factory instead of that Encounter.
As always, even against the hardest Scythe AI, there are a lot of challenges missing that real players would bring to the table. One of those being real players will hone in on and target those that start taking the lead and getting early advantages. Bots also make a lot of odd choices and sometimes almost cringeworthy actions. For instance, Crimea and Rusviet are hands down the strongest factions in the game that would’ve challenged us a lot more; but in the hands of a bot, they sometimes do little more than fill space – if they even leave their starting bases.
That’s not to say this combo can’t win a short game against real players. As you saw in the FOMOF’s video earlier, this combo can win games in 14 rounds or less against competitive players. If you didn’t watch earlier, take a break and watch it: FOMOF wins in 14 turns with Saxony Patriotic. Check out his channel for other videos, as he’s a wealth of knowledge for anyone wanting to improve their Scythe gaming abilities.
Tips.
With Saxony’s heavy reliance on combats, don’t burn through power and combat cards aimlessly. To keep this strategy streamlined, we need to accept we will only have a very limited supply of power and combat cards to use. So look for easy fights, and team up your mechs as often as possible.
Use your mech abilities to their fullest. Underpass and Disarm are Saxony’s unique abilities and they are powerful when utilized. With Disarm, all fights on Tunnels are to your advantage, so lure your opponents in or seek the ones camping on Tunnels for fights that will swing quickly in your favor.
Also, don’t be afraid to lose fights. With Speed and Underpass unlocked, your units can go from being out of play to getting anywhere on the map with a tunnel, getting you right back into the fight with an opponent who might have spent a great deal of Power and Combat cards to beat in combat the first time.
I hope you enjoyed this strategy read through for Saxony Patriotic. Scythe is an amazingly fun boardgame, and the more you learn the more you can enjoy all the nuances. If you’re new to the game, check out our Saxony Empire overview as well as additional strategies for other factions we’ve compiled.
I would love to hear any successful strategies with this combo that you’ve had as well as any thoughts and critiques on this one.
Happy Gaming!
- Norman
6 comments on “Saxony Patriotic Strategy”
Harry E
September 24, 2020 at 7:08 amI just won my first game of the digital version ever using this guide. I diverged a bit around turn 10, but I had gotten a little lucky on my encounters and was able to get all 4 recruits very quickly because of them. 52 points in 14 turns, and I’ve played 3 games total on the tabletop and 1 digital game. Thanks for the tips.
TheDailyScythe
September 28, 2020 at 3:32 pmHey Harry!
Glad it helped you out! 14 turns is fantastic! We’ll try to keep churning out enjoyable content.
– Norman
John
June 19, 2020 at 5:00 pmCurious about how you could make these moves, even with speed, in #8:
MOVE: Mech + 3 Workers to Tunnel Village, Mech + 2 Workers to Togawa Mountain, Hero to Togawa Mountain Encounter.
The previous move put the Hero on the base village, making Togawa Mt encounter 3 steps away. (Same for the meeples; could be clearer for you to state the first mech has to drop one off on the base mountain?)
TheDailyScythe
June 19, 2020 at 11:06 pmHey John,
These moves are accurately stated. Due to the Underpass Mech being deployed, Hero can go from Saxony Village to Saxony Mountain straight to any Mountain hex occupied by Saxony. Hence why we want to move the second mech + workers to Togawa Mountain first.
Matt Hollis
August 20, 2020 at 2:19 amI didn’t get it from the description either, but when I watched your stream I understood the ordering of the movement matters.
So… I just learned about the moving between controlled mountains and controlled villages part of Underpass ability. Very cool. Thanks.
TheDailyScythe
August 27, 2020 at 5:10 pmHey Matt,
Gotcha. Yeah, sorry if the wording seems a bit unclear. But yes, Underpass allows Saxony to move from Mountain hex to Mountain hex (much like Tunnels) if both hexes are occupied by them.
Thanks for reaching out!
– Norman